‘Stranger Danger’: the special effects
by Jeremy Cooper (Director, Editor)
See also Making the backgrounds, Movie Trivia
The special effects were made by building up layers of images, and then using “colour keying” (also called “colour separation overlay”) to make part of the image transparent.
The main colour key used nowadays is a bright green – “green-screen”. It used to be blue, but people’s eyes and clothes (especially blue jeans) tended to stop that working properly. So everyone switched to using a shade of green which is seldom found in clothes, eyes, food …
But you can use any bright colour which is not anywhere else in the scene you are shooting.
(Geek note: the edit used Adobe Premier Pro CC on an Apple iMac computer.)
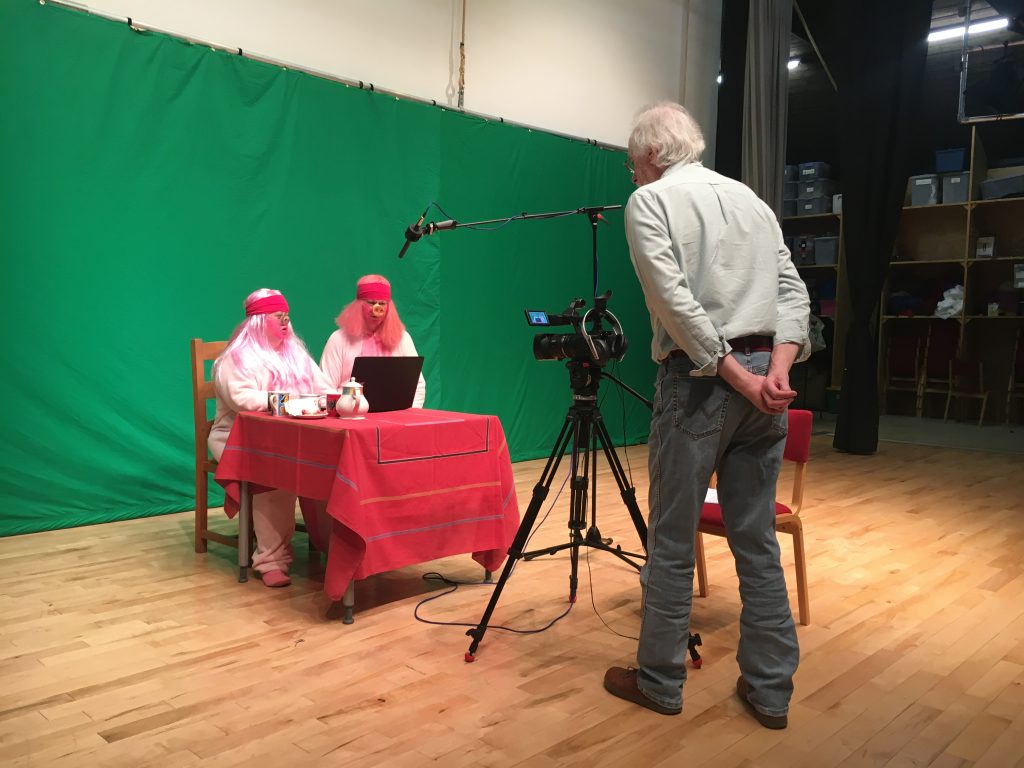
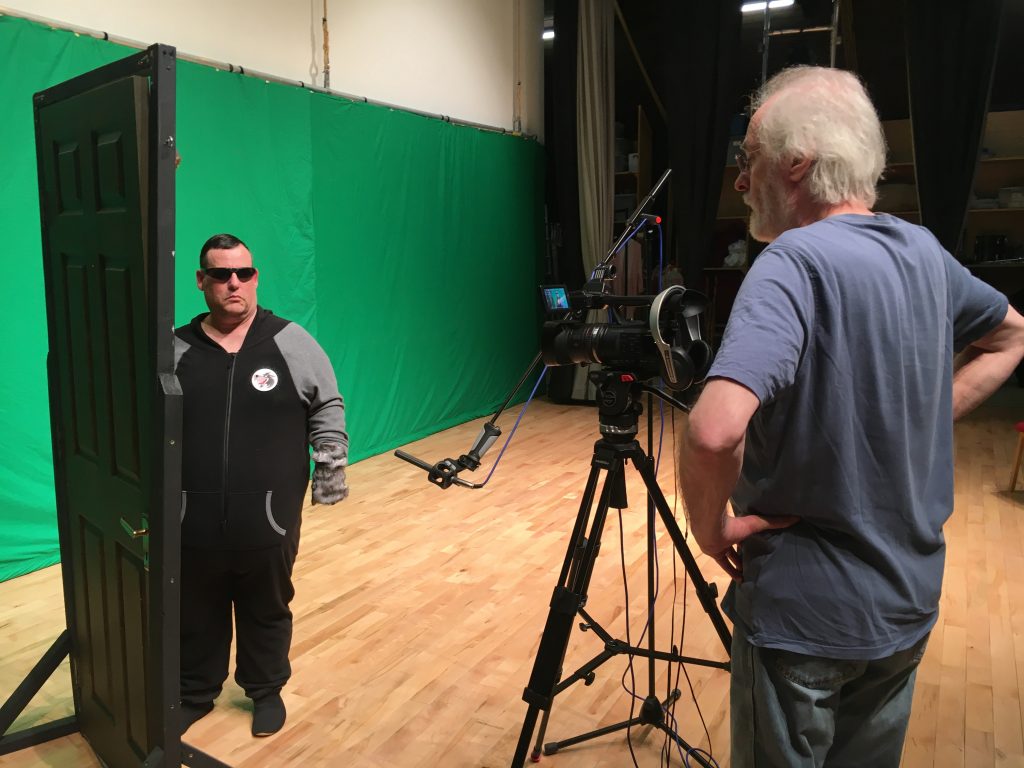
This was the basic shooting setup for the sticks house interior shots.
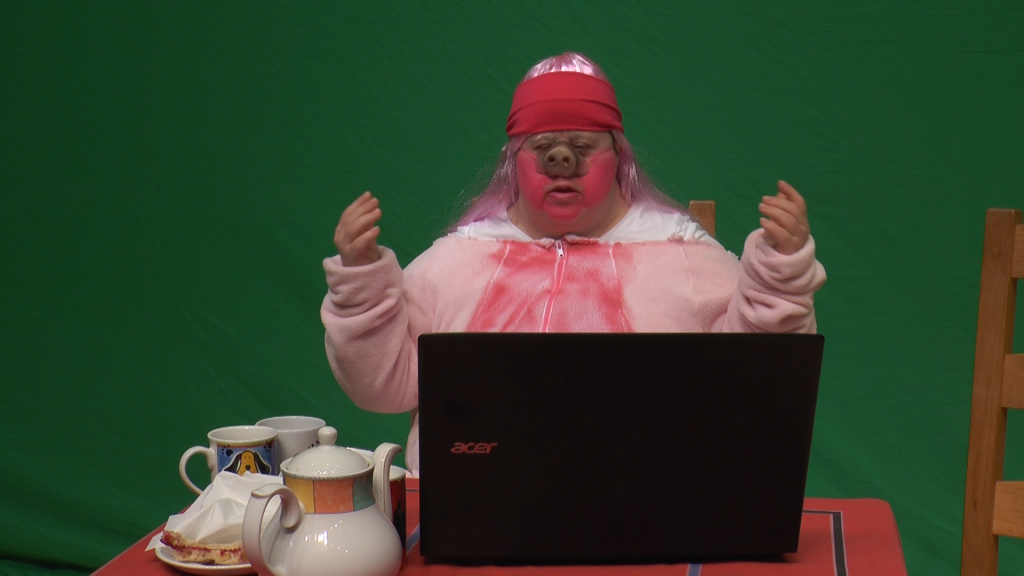 This is what the camera saw – the actor, furniture and props in front of the
green-screen stretched behind.
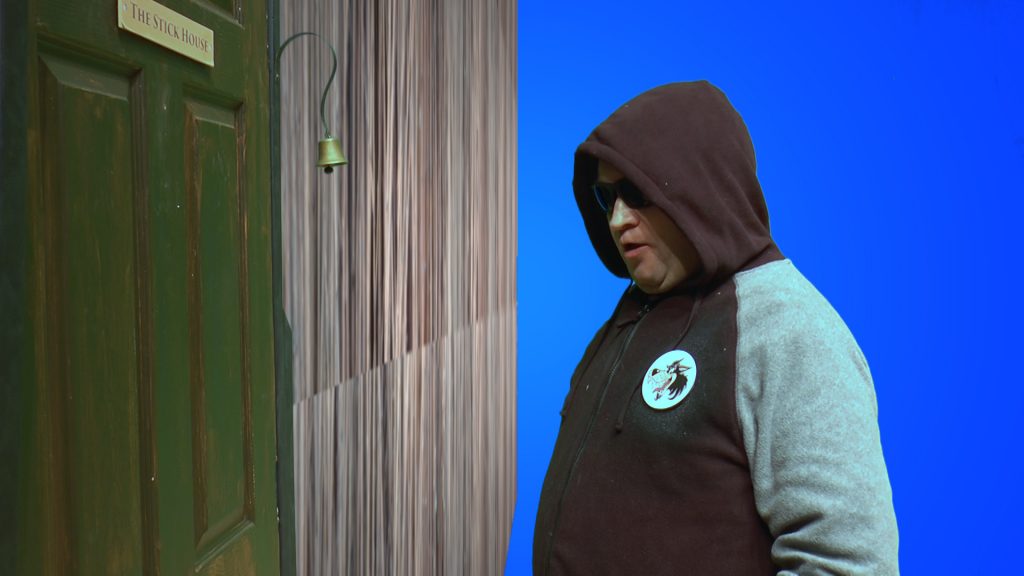
(The green was really much brighter than it appears here – see the Wolf-at-the-door example, below.)
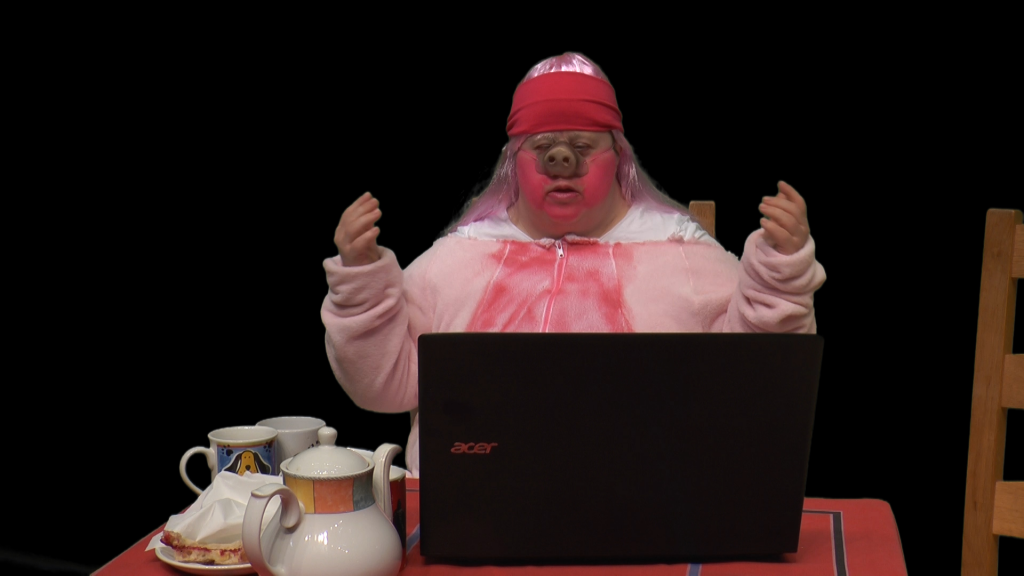
The editing computer has turned (‘keyed’) the green to black –
the black is, in effect, transparent.
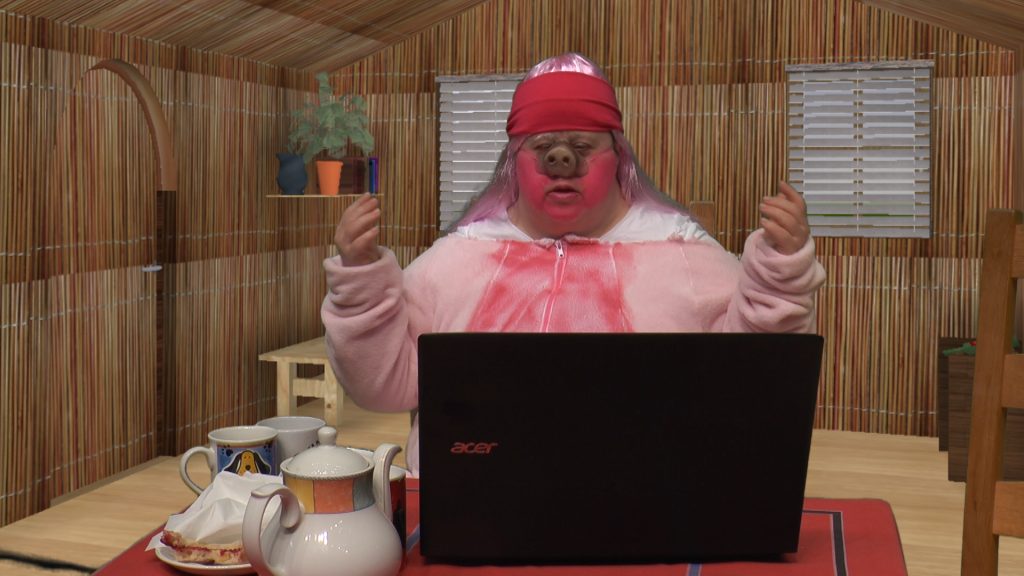
We add the background image, and can see it through the transparent black.
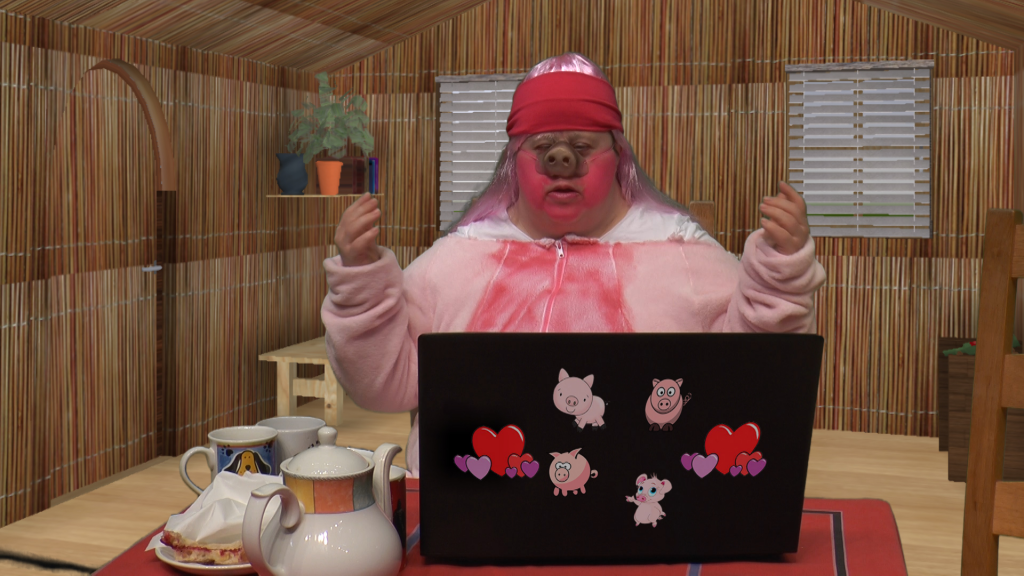
The image of the stickers is now superimposed on the computer screen.
That’s the final shot!
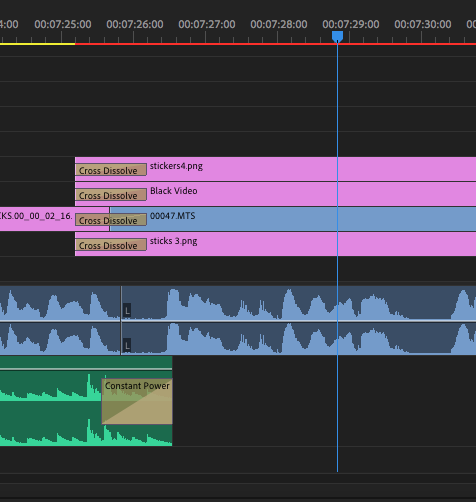
This is the editing ‘timeline’ – you can see the different tracks (layers) that make up the shot:
- the blue track ‘00047.MTS’ is the main camera shot of the actor, the chairs, the table, the tea things and the computer all in front of the green-screen.
- the pink ‘sticks3.png’ track is the sticks house background (see Making the Backgrounds for how I did that).
- the pink ‘Black Video’ track is to hide the Acer trademark sign on the computer!
- the pink ‘stickers4.png’ track is the image of the stickers. I could move that around and angle it to keep it on the back of the computer, whatever angle that was at.
- the green and darker blue tracks at the bottom are the sound.
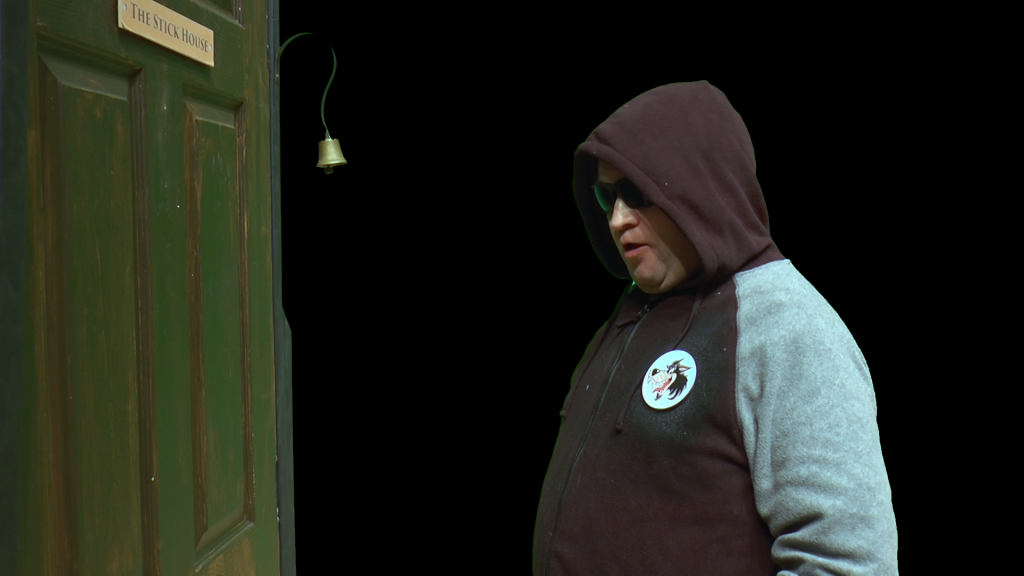
The ‘outside’ scenes were a bit trickier – I had to use two levels of colour-keying to make it possible for the house walls and door to ‘fly away’ when the wolf huffs and puffs, leaving the countryside behind.
This was the basic shooting setup for the wolf-at-the-door scenes.
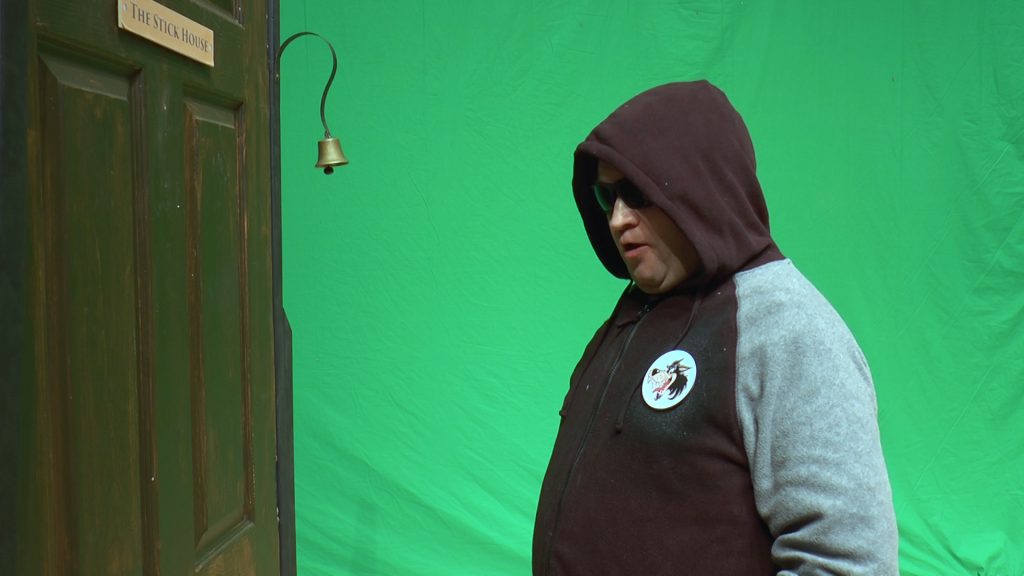
This is what the camera saw.
The green has been keyed to transparent black.
Through the black we can see the image of the sticks wall, with a blue background to fill the rest of that image frame.
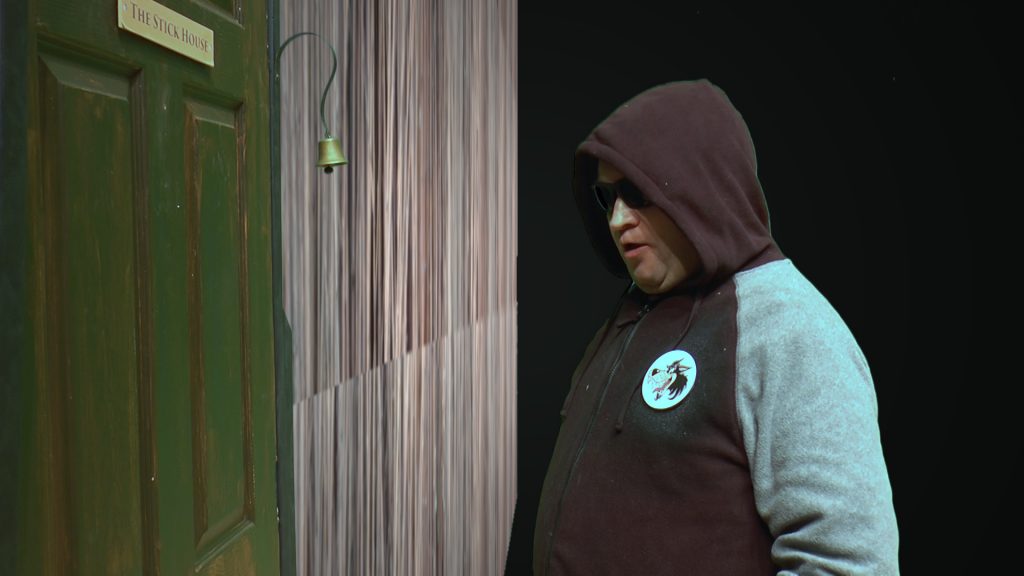
Now the blue has also been ‘keyed’ to transparent black.
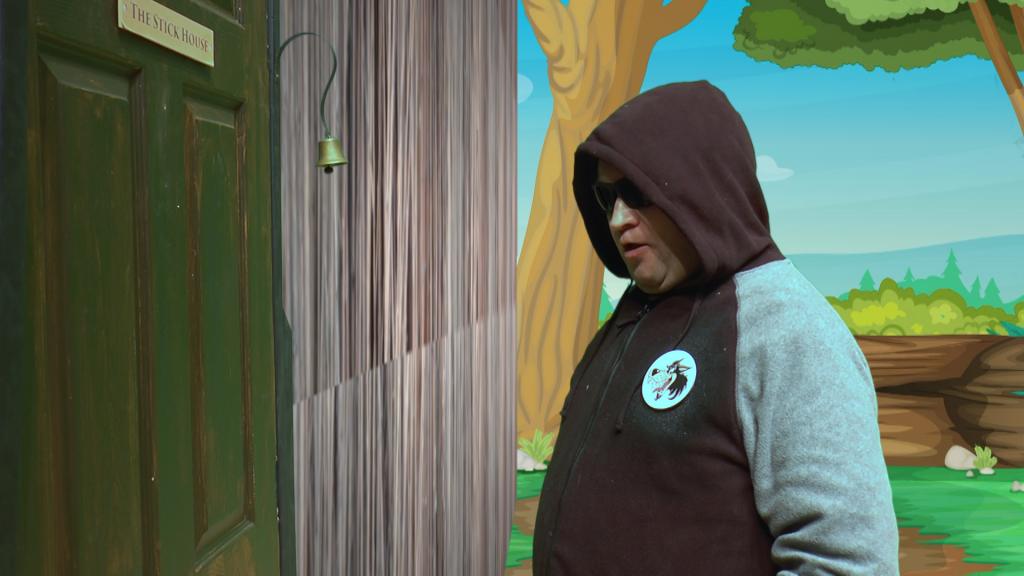
Finally we see through the two layers of transparent black to the image of the countryside.

This is the timeline:
- the blue track, ‘00152.MTS’ is the camera shot.
- the pink ‘stick door copy.png’ track is the sticks wall.
- the pink ‘13496086_m.jpg’ track is the countryside background.
The darker blue track at the bottom is sound.
See also Making the backgrounds, Movie Trivia
But why use green-screen?
When we first started to discuss the video, the actors, helpers and I spent time thinking about the set and locations – a forest, a straw house, a sticks house, a brick house and so on. We had lots of good ideas, but they all seemed to be too time consuming to fit into shooting on one day a week – and some were outdoors, so the weather might spoil our schedule.
One Tuesday (that’s the day the drama group meets) one of the actors, Liam, asked quite out of the blue, couldn’t we shoot it using green-screen. Now, I had experience of using “blue-screen” during my BBC days, and I knew it to be a very tricky business: the screen needed to be really wrinkle-free, and the lighting on it needed to be very, very even. So I thanked the actor warmly for his suggestion, explained the problems, and said it really wasn’t practical.
The very next weekend I went to ‘The Making of Harry Potter’ tour at the Warner Brothers Studios outside Watford (highly recommended for a really amazing day out, even if you are not an avid Harry Potter fan). There I saw a room full of green-screen booths where you could ride on a very dynamic broomstick surrounded by green-screen, and see yourself on a TV screen flying through the Hogwarts landscape (you could buy a DVD of your flight too). I was amazed at how un-stretched and un-evenly lit the green-screen was!
When I got home I studied previously un-explored regions of my Premiere Pro editing software, and discovered “Ultra Key”. This is the crucial software device that converts the green into transparent black. Computer software has come on a very long way since I used blue-screen at the BBC: Ultra Key can be set to recognise a whole gamut of shades and shadows around the “pure” green colour, and “key” off it all evenly.
So the next Tuesday I announced – taking a deep breath – that green-screen was a runner, and that we could shoot the whole video on the stage at our Chrysalis Theatre, saving time, effort and uncertainty. So that’s what we decided to do. Sheets of green-screen were purchased, sewn together in the Camphill craft workshop, and hung across the cyclorama at the back of the Chrysalis stage. We were all set to shoot!
Using green screen added all sorts of posibilities: we could make the settings more story-bookish, like cartoons, and give the whole production an extra, exciting dimension!
Thanks Liam!
See also Making the backgrounds, Movie Trivia